How to Clean Printer Ink And Toner Off of Your Hands and Fabrics

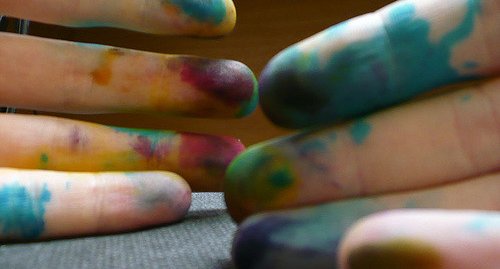
Getting the stain is easy — to clean printer ink and toner off of your hands and clothes isn’t.
You’d hardly escape getting stained when changing your toner cartridge or printer ink; stains may also follow a paper jam.

Don’t let the mess weigh you down. Use the guide here.

First, take precaution.

Test a small (preferably invisible) part of your clothing to figure out if the chemical you plan to use would solve your problem or worsen it.

Check your clothing tag for any care guides before attempting to remove ink or toner stains.

If your clothing tag forbids you using bleach — for set-in stains only — use a pretreatment solution consisting of two tablespoons of liquid detergent, three tablespoons of white vinegar, and one quart (i.e., one liter) of warm water.

Let’s explore step by step how to clean printer ink off of your hands and fabrics — starting with your fabrics. Read on.

Clean Fresh Ink Stains Off of Clothes and Fabrics


Use a damp towel or sponge: Using a clean, damp towel, dab the stained part of the garment until you completely lift the ink off of the area. You may use a sponge in place of a towel.

Air dry: Allow the stain to air dry.

Hairspray or alcohol: Dab the stain with alcohol or spray it with hairspray.

Paper towels: Insert your stained garment between two paper towels.

Blot the stain out: Force the stain out into one of the paper towel by blotting the back side of the fabric.

Repeatedly blot the stains out: Lift off the stain by repeatedly pressing the affected area of the garment into the clean segments of the paper towel. Make sure you are pressing and moving the paper towel to ensure the stains do not retransfer into the cloth. Use new paper towels if you see a need for them. Continue this process until you completely remove the stains.

Clean OldInk Stains Off of Clothes and Fabrics

Cleaning off printer ink stains that have settled into your garment requires a bit more rigor. Here’s the process:

Apply detergent: Use a small amount of liquid laundry detergent on the affected area.

Scrub: Scrub the stained spot with a toothbrush; this should start lifting the stain.

Use bleach (if appropriate for your garment): If the scrubbing didn’t remove the stain, mix one part water with one part bleach, dip the toothbrush in the solution and softly brush the stain off.

Wash the cloth: Wash the cloth immediately. Your garment must NOT dry between scrubbing and washing it — the loosened ink stain would set back into your fabric if dried.

Dry the garment: Dry the garment flat or hanged. DON’T use a dryer. Using a dryer would set-in any remaining ink residues into the fabric. Repeat this process (1 to 5) if you find any ink residues after your garment dries.

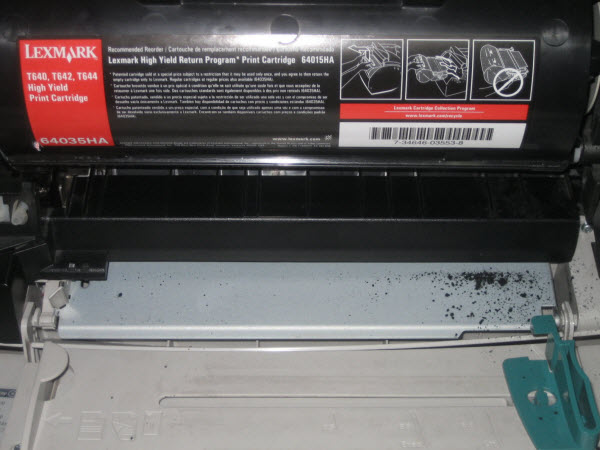
Clean Toner Stains Off of Clothes and Fabrics

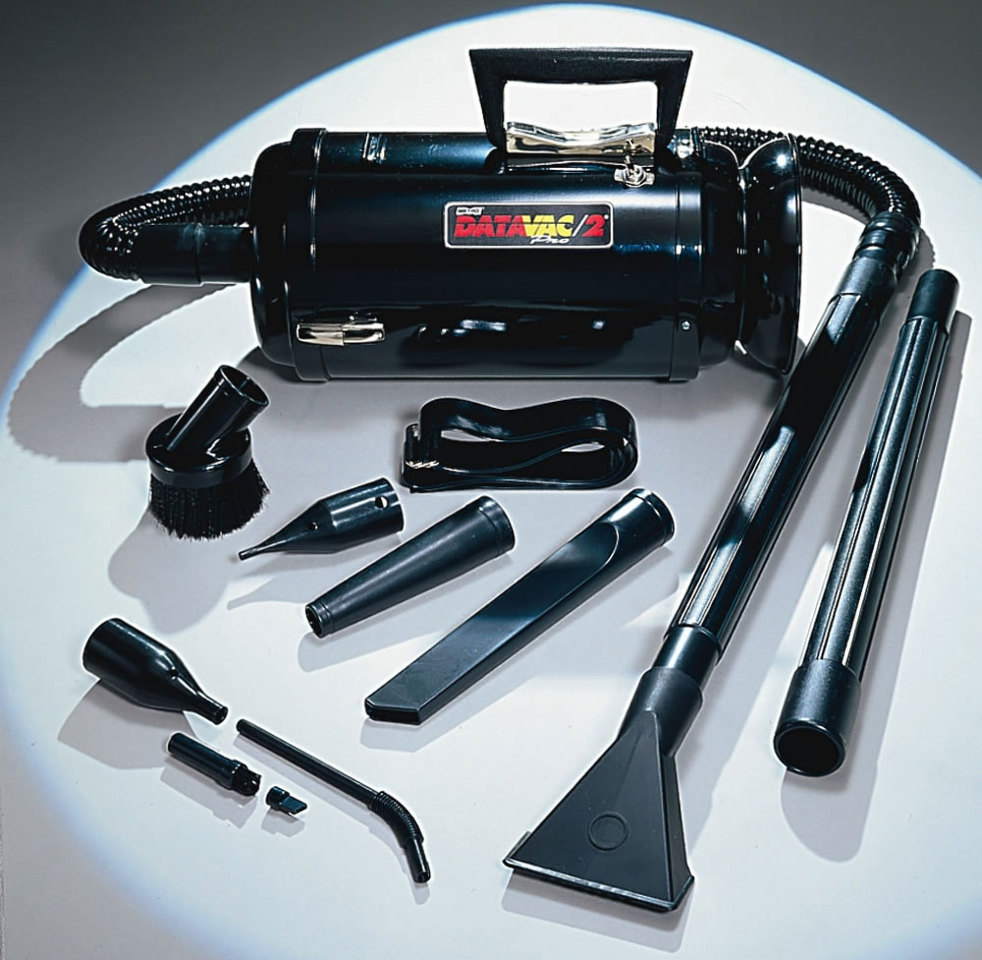
Hand vacuum: First off, vacuum the area affected by the toner stain, and then take off your clothing.

Shake: Once taken off, shake the garment vigorously to remove the remaining toner stain.

Brush: Use a soft bristled brush to clean off the stains gently. DON’T rub the stain as doing so forces the toner powder deeper into the fabric.

Brush alternative: You may use a dry piece of cloth, like a towel, instead of a bristled brush. Use the dry cloth in a brushing motion — make sure it’s a piece of cloth that you don’t mind soiling.

Using rubbing alcohol: Blot the toner stain with an absorbent cloth you’ve dampened with rubbing alcohol.

Use hairspray: Spray the affected area with hairspray and blot BOTH sides of the fabric with the towel, then wash the garment in a washing machine using COLD water. Stains could become permanent if heat fuses the toner dust, so make sure you’ve completely removed the stain before exposing your cloth to a dryer.

Clean Printer Ink Off of Your Hands

About all printer ink or toner stain removers have their downsides — especially if the stain is on your skin.

I have provided a list of eight ways to clean ink or toner stains from your hands, and possible health hazards that follow each of these options.

Bleach: Mix 1 part of bleach with ten parts of water. Rub the affected areas with the solution until the stain is wiped off. Make sure you wash your hands thoroughly using soap and water after removing the stains. Neutralize the smell of the bleach by squeezing orange or lemon. Bleach is caustic. Chlorine is an ingredient in bleach; it can cause burn and irritations of the eye, nose, and throat; it can also cause pigment loss. Bleach can also cause vomiting and nausea.

Nail polish remover: This can remove printer ink or toner stains from your hands. However, you want to be careful with using a nail polish remover on anything apart from your skin as it’s capable of removing your furniture’s finish. Acetone, better known by the name ‘nail polish remover,’ can cause dizziness, irritation of the eyes, skin, and throat, and headaches if exposed to it too often for too long.

Rubbing alcohol: After using rubbing alcohol to get the toner or in off of your hands, apply some lotion to avoid drying out your skin. Make sure you keep the liquid away from your nose and do not ingest it.Isopropyl alcohol — the scientific name of rubbing alcohol — when ingested or inhaled causes side effects like dizziness, headaches, nausea, flushing, vomiting, and in some extreme cases may cause coma.

Hairspray: Apply hairspray on the stained area, leave for some time to dissolve the ink or toner. And then Wash it off. Swallowing a small amount of hairspray, unintentionally, isn’t dangerous — but deliberate swallowing of the substance can cause harm. The alcohol content of hairspray, according to Poison.org, is the only dangerous ingredient it has.

Glass Cleaner: Most homes and offices have some glass cleaner lying somewhere. Use this option to remove fresh stains. Spray the glass cleaner on the affected parts of your hands and wipe them with a paper towel BEFORE the ink dries out. Make sure that you do not breathe in or swallow the glass cleaner. This liquid, which contains ammonia (and other potentially toxic substances like ethanol, isopropyl alcohol, and methanol), can irritate the eye, lungs, and throat, and can damage the airways and mucous membrane.

Baby Oil: Baby oil coagulates the ink or toner stains quickly, especially when it’s still fresh. Overall, this is the safest option on this list.

Tea Tree Oil: Apply a few drops on a piece of clean dry cloth, and then scrub off the stain. To clean your skin thoroughly, repeat the process while using a fingernail brush to reach the crevices of your skin. Repeat until you’ve completely cleaned off the all the ink. Although Tea Tree Oil won’t harm you, it has a strong odor you might not like, so use it in a well-ventilated place. Don’t ingest tea tree oil as it might have serious side effects like unsteadiness, rash, and in extreme cases coma. Use other solutions on this list if you have acne, as tea tree oil may cause skin dryness, burning, stinging, and redness. Amazon and other retail outlets sell the product.

Hand Cleaner Solutions: Solutions like Goop and Gojo. These cleaners are for removing grease but can be used to remove ink and toner stains as well.

Conclusion

When dealing with ink or toner stains on your fabrics make sure to check clothing tags for care instructions — using bleach or rubbing alcohol may be inappropriate for some garments. Remember to test a small, invisible area of your cloth to determine if using a particular chemical would be appropriate or not.

Whether your fabric allows bleach or not, this article covers your need. Where using bleach is inappropriate, use the pretreatment solution described in the first few paragraphs of this article.

Applying chemicals to your skin should be done with utmost care. If you’d experience irritations with certain chemicals, try out other options on the list when removing stains from your hand.

It’s usually best to clean off ink or toner stains from your skin as quickly as possible; for example, using baby oil is deemed completely harmless. You have eight options from the list above, choose a handy option if you ever need to clean an ink or toner stain off of your skin.

We offer the best market rate. If you have new toner to sell, we can give you a quote in an hour; we’ll pay you here — online — and even cover shipping. Let’s talk.

Help Me! My Toner Cartridge Is Leaking

Things go wrong every once a while — I haven’t met anyone who can control all the events in his life. Resilience, it seems, is all that matters in the end. This philosophy applies to leaking toner cartridges as well.


If you use refilled toner, then your chances of experiencing a toner leak are significantly higher than if you use OEMs or compatible toners. Of course, OEM and compatible toners are not immune to leaks; refilled toners just have a higher probability of leaking.


This guide provides you with step-by-step processes for cleaning up toner leaks. If you do not have basic printer maintenance skills or if opening up your printer would void your warranty, then you should contact the manufacturer or hire a professional to help. Now, let’s dive in.

How to Clean Up a Toner Cartridge Leak

toner-leak-counterfeit.jpg

Image Credit: HP


If your toner cartridge is leaking, then you should take the steps outlined below to cleaning up the plastic-dust without causing further damage to your cartridge, health, or furniture. Read on.


What NOT to do: Don’t use the regular vacuum cleaner! The toner is plastic dust, and you shouldn’t inhale it. Using a vacuum cleaning blows toner particles into the air, causing issues beyond the toner dust itself.


Well, you may ignore that warning if your printer has a specially designed vacuum for cleaning toner particles, called ESD (Electrostatic Discharge-safe) toner vacuum. The EDS vacuum has HEPA (i.e., High-Efficiency Particulate Air) filter that effectively cleans up toner spills. However, you don’t need any special vacuum cleaners if you don’t have one.

toner-vacuum.jpeg

Toner Vacuum. Image Credit: Ebay


To clean up the toner leak, get these materials ready:


  • Latex gloves,

  • Paper towel,

  • Non-surgical face mask,

  • Trash bag,

  • Clear plastic, and

  • Compressed air sprayer


I’ve divided this cleaning process into two sections. First, clean the machine and then the spill site.

How to clean your machine:

1. Protect Yourself: Inhaling toner dust or having it on your skin isn’t healthy. Toner particles are extremely fine plastic powder and breathing them in can cause you serious health issues.

If you already had contact with the toner dust, clean it off your skin first. Take care of your skin first before cleaning other surfaces. You may use cold water to remove toner from your skin or hasten the removal process by using an abrasive cleaner.

Make sure that you have your face mask and latex gloves on before tacking the cleaning task. Inhaling toner dust can cause nausea, dizziness, headaches, irritations in your throat, and even lung problems (just as if you’re a cigarette smoker).


2. Allow Machine to Cool and Unplug from Electrical Contacts: If you’d turned the machine on before noticing the leak, turn it off and leave it to cool for, at least, one hour. Letting your printer cool off is essential because heated components of the copier can cause burns if you don’t allow to cool before attempting to clean it.

Make sure that you unplug your devices from electricity before you start your cleaning work. Ensure you’ve turned off the machine, unplugged power cords from AC power sockets, disconnected all cables, and stayed away from any nearby electrical contacts.


3. Bring Out Your Toner Cartridge: Open your copier’s front cover panel, using a paper towel underneath, pull your toner cartridge out. If your printer’s toner cartridge is assembled inside of a drum unit, pull out the drum unit from your printer. Make sure you don’t tilt the cartridge unduly not to worsen the toner spill.


Image Credit: Ink Technologies (YouTube)

Now, put aside the drum unit you pulled out. Avoid interfering with that drum unit.


4. Don’t Scatter Toner Further: To stop toner dust from scattering all over the place, put some clear plastic down to use as a base for your machine. Remove spilled toner powder form the copier, using a paper towel, and put them into a trash bag.

During this cleaning session, do not use water or any liquid solutions to prevent any likely damages they may cause to printer components. Liquids may also cause your toner powder to stick.


5. Finish Up Your Cleaning:

Now, if you have an EDS vacuum, it’ll find use at this stage. You can use compressed air to remove whatever toner dust remains on the copier. Make sure to give four inches of space between your vacuum cleaner and machine. Vacuum your cartridges as well.


6. Reinstall Your Copier: Now, go ahead and reinstall your machine, connect your printer cables, plug it to power, and power it on.


If your toner cartridge leak is excessive and you suspect that it may have already affected other parts of your printer, that would be a lot more work than you can handle. You may endanger your health if you take on the task of cleaning your machine by yourself. It’s best that you call a qualified copier servicing professional.


How to clean a toner spill site:


Toner spill site. Image credit: Flickr


After cleaning your printer, you may want to clean up the spill site. Use these tips:


Scoop up toner deposits if they are large, and put it in a trash bag and seal it. Make sure to check what your local regulations allow, if you may dispose of the toner powder in your public waste disposal system.

 Wet a paper towel with lukewarm water and wipe down the spill site’s surface.

 Wipe down toner from your carpet by dabbing it with a dampened clean towel and dry cleaning fluid. Do not use water. Using water would likely stain the carpet permanently. If you can’t use dry cleaning fluid, use a toner vacuum.

 In case you find any remaining toner on the floor or other surfaces, you can use a toner vacuum to vacuum them all up. It’s imperative that you use ONLY toner vacuum and not a different type of vacuum cleaner. The filters of toner vacuum cleaners can pick up toner dust without dispersing them through the air.


Reduce the Leak and Salvage the Cartridge

It’s best to call your manufacturer or a trained technician to help you determine if your toner leak can be reduced or fixed. If the leak is from a toner cartridge that’s still full, then you may be reluctant to change or buy a replacement so soon.


Checking with your manufacturer or maintenance professional could help you determine if buying a new cartridge is the smart option. However, more often than not, you’d have to replace a leaking toner cartridge with a new one.


How Long Should Ink Cartridges Last?

One of the main questions people will ask when they purchase ink cartridges is how long the cartridge will last. To answer this question properly, you must first look at different aspects of the cartridge. Understanding this information will help you determine how long you should expect ink cartridges to last.

Why Does Cartridge Size Matter?

The first thing to look at is the actual size of the ink cartridge. Ink cartridges come in many different sizes.

There are even several different sizes available for one particular brand and model of printer. Larger cartridges could give you better value and last longer.

When you are looking at this information, make sure you keep an eye on the volume of the cartridge rather than the capacity

Choosing a cartridge that has a higher volume will naturally last longer than one with a lower volume.

CartridgeWorld , if your cartridge is an all-in-one model, you can expect for it to run out faster than if the colors were separate. Most of the time, when a color runs out in one of these cartridges, it will stop working altogether.


How Does your Printer Affect the Cartridge?

Your printer and how often you print could also be an indicator of how long your ink cartridge will last.

According to WiseGeek , different types of printers and print jobs require different types of ink.

Many printers are limited on the size of cartridges and only offer one solution. If this is the case, the
overall quality and performance of your printer could determine the lifespan of your cartridge.

For example, lower quality printers often have a lower capacity cartridge to go along with them. This will cause them to not last as long.

Likewise, if you print frequently, you can expect to run out of ink sooner rather than later.

The amount of printing you do on your printer is a key factor in how long your cartridge will last as is the type of documents you print.

Printing high-quality color photos will drain an ink cartridge much faster than printing black and white documents.


Surprisingly, there are actually things you can do to make your ink cartridges last longer. In fact, you can learn quite a few tips from the Frugal Living website.

When it comes to maintaining your cartridges, start by allowing the printer to clean the nozzles and print heads every time you change out a cartridge.

This will help you avoid clogs, which could affect your print quality and make it harder for an ink cartridge to function properly.

In addition to this, make sure you use your ink cartridge regularly. Avoiding use of your printer could cause some of the ink to dry up or for clogs to occur.

This could mean you will need to run the printer through its cleaning system, which will use up more of the ink.

If you are experiencing an issue with ink residue, a damp cloth can sometimes be the answer. However, you will want to check with the manufacturer’s suggestions for this issue because some cartridges may require a different type of maintenance.

For those planning to store their ink cartridges, you should make sure they are stored in a place that is dark and dry.

You will also want to take note of the expiration dates so that you make sure you use them before that time. Turning the cartridges on their side is also the best decision because it can help keep clogs from occurring.

According to ColorTonerExpert, there are several other things you can do to store your cartridges properly. Here are some of the top tips they suggest:

1.) Avoid touching the print head

2.) Keep the Tape

3.) Know the shelf-life

4.) Keep it in the package

5.) Avoid the light as well as heat


Can you Revive a “Dead” Cartridge?

When your ink cartridge runs out of ink, one of the first things you may attempt to do is shake the cartridge.

For some cartridges, this could allow you to print several more pages of print. Unfortunately, this is not always the case.

This is actually a tactic that can be easily used for toner cartridges, which are filled with powder instead of regular ink.

Over time, the powder can become lodged in the cartridge and shaking it could dislodge some of it.

For other types of cartridges that use ink rather than powder, it is much less likely that you will be able to revive a cartridge by shaking it.

Sometimes, however, it is possible to print a few more pages by simply cleaning around the area where the ink is dispersed.

You can also try this trick to unclog an inkjet cartridge.

This is all information that can help you determine how long you should expect your ink cartridge to last.

The important thing to remember is that you should follow the instructions the manufacturer gives you in order to give it the longest lifespan.

In the end, following this information can allow you to get the most value from the ink cartridges you purchase.

How Do Toner Cartridges Work?

One of the interesting aspects of laser printers and copiers is the toner. 
Rather than the printer applying ink, the paper actually “grabs” the toner.
The toner itself is not ink, but rather an electrically-charged powder made of plastic and pigment.

How does toner work?

The two ingredients of toner, plastic and pigment, each have a simple role in the printing process.

The pigment provides the color, while the plastic allows the pigment to stick to the paper when the plastic is heated and melts.

The melting process gives laser toner an advantage over ink, in that it binds firmly to the paper fibers, resisting smudges and bleeding.

This also provides an even, vivid tone that helps text appear sharp on paper.

Another advantage of toner is the cost. Offices usually choose laser printers because the cost of replacing the toner cartridges is less than inkjet printer cartridges, and laser printers tend to cost only slightly more than inkjet printers.

Anatomy of a toner cartridge

The design of a toner cartridge varies with different models and manufacturers, but the following components are commonly found in most toner cartridges.

Toner hopper:The small container which houses the toner

Seal:A removable strip that prevents toner from spilling before installation

Doctor blade: Helps control the precise amount of toner that is distributed to the developer

Developer:Transfers toner to the OPC drum

Waste bin:Collects residual toner wiped from the OPC drum

Wiper blade:Wipes away residual toner applied to the page

Primary charge roller (PCR):Applies a uniform negative to the OPC drum prior to laser-writing. It also erases the laser image

Organic photo-conductor (OPC) drum:holds an electrostatic image and transfers toner onto the paper

Drum shutter:protects the drum from light when outside the machine and retracts the drum into the printer

How does the cartridge work?

In most cartridges, the toner hopper, developer and drum assembly are all part of the replaceable cartridge unit.

When an image or text is being printed on paper, the printer gathers toner from the hopper with the developer.

The developer, composed of negatively-charged magnetic beads attached to a metal roller, moves through the hopper gathering toner.

The developer collects positively-charged toner particles and brushes them past the drum assembly.

The electrostatic image on the drum has a stronger negative charge than the beads on the developer, so the toner is pulled from the developer onto the drum.

Next, the drum moves over the paper. The paper has an even stronger negative charge than the drum, and pulls the toner particles off of the drum in the shape of the electrostatic image.

Next, the paper is discharged by the detac corona wire.

At this point, gravity is the only thing keeping the toner in place. In order to affix the toner, the paper needs to pass through the fuser rollers, which are heated by internal quartz tube lamps.

The heat melts the plastic in the toner particles, causing the toner to be absorbed into the paper fibers.

Although the melted plastic sticks to the paper, it does not adhere to the heated fuser rollers.

This is possible because the rollers are coated with Teflon, the same material that helps food slide out of non-stick frying pans.

Color vs. Monochrome Printing

Color toner works essentially the same way as monochrome toner, except the process is repeated for each of the toner colors.

The standard toner colors are cyan (blue), magenta (red), yellow and black. The black is needed because the three primary colors (red, yellow and blue) can be combined to form any color except black.

The reason for this is black is not technically a color, but the complete absence of color.

These four toner colors, when combined at varying levels of saturation and lightness, can produce millions of different shades and hues.

This quick guided tour of toner cartridges should help provide a basic understanding of how they work.

The current technology of toner cartridges has allowed laser printers to dominate the office printing market.

In the years to come, new designs of toner cartridges promise to provide more efficient and cost-effective solutions for office and home printing.


Three Most Common Methods Used to Refill Toner Cartridges

A toner cartridge is a very important part of a printer. It is very significant to the working of a laser printer. Purchasing one can however prove very expensive.

Finding the right model may also be a daunting task. As a result, many people tend to opt for refills. One thing to note about the same is that toner cartridges are very delicate.

And there is a slight chance you might miss.

The recommendation often given is to leave the task to a trained professional. But really there is no need for that if you can as well know how to go about it?

Below are the three most common methods used to refill toner cartridges. The guide will surely help you avoid the mess.

But first, let’s start with a typical framework of a toner cartridge then look at the refill kits and later have the common practical & procedural approaches.

Most toner cartridges bear integrated compartments that serve to hold the toner, control it as well as monitor the circuitry

They also feature large drums and one or more smaller rollers. Some cartridges have additional features, but most of them bear the top and bottom body parts.

Original Equipment Manufacturer (OEM) toner cartridges are hard to refill. They are by design not supposed to be refilled by persons who are not professionals.

However, as earlier indicated, this is not impossible. Refill kits vary in sizes, types and models. Also, some are provided with toners and tools necessary for opening and cleaning.

On the other hand others are accompanied by the toner and a syringe.

It is important therefore to look for the refill kit based on the model and type of toner cartridge. It is crucial to specify for instance, if you are looking for a refill kit for a HP Laser Jet 5.

Other tools you need to try and have include: screwdriver, cleaning supplies as well as rubber gloves.

The Toner Refill Approaches

1. Full Service Method

Begin by disassembling the toner cartridge. While at it, wear rubber gloves. Each part of the body should have its own set of screws. Store the screws well after removing them.

Pull the plates of either sides of the toner cartridge straight off. Jiggle the two halves of the cartridge gently back and forth to pull them apart.

Remove the large colored drum from the now open body then pull out the smaller roller behind it. This should reveal a tinny thin strip of metal.

Remove the screws before lifting the strip of metal out with the relevant tool, often a needle-nose plier or tweezers. You should take care not to bend the metal.

At this point, the old toner should be visible in the partition under the strip. Dumb the toner out and clean using canned air or a spirit-soaked piece of cloth.

Then replace the piece of metal and the cartridge rollers in the correct order they were before disassembling. This should come after carefully cleaning all the other components.

Also, cleaning the drum properly will contribute to improved performance.

Next, remove the thin roller on the other half of the cartridge. This is such that it is much easier to dump the toner powder from the body and to clean out the compartment with the air can.  

Again, this will reveal a narrow outlet next to a familiar-looking metal strip. The opening leads to a toner reservoir.

You should then be able to pour the powder into the gap using the included funnel. Feel free to make a panel funnel in case one was not included in the refill kit and use it to direct the toner powder. 

Fill the reservoir until it begins to overflow. Move the nozzle from one side to another to make the toner even.

Next, clean the roller, snap it back into place, and thoroughly wipe down the surrounding area to remove any excess powder.

Finally, reassemble the body parts and end the plates. All parts should snap back into place smoothly with minimal force.

Then, clean stray toner discovered in the crevasses and reinsert back all screws. Once the toner cartridge is reassembled, ensure that the drum rotates smoothly.


2. Quick Puncture Method

Some refill kits are designed to let the user refill his/her toner without even disassembling the cartridge. They include a special puncture bit that can be placed in a common drill even though some people use soldering irons

With these tools, the user must make a hole toward the rear of the cartridge where the toner reservoir is.

After the hole is made, the toner powder should be poured straight in with the funnel. Finally about this, the opening should be sealed with duct tape or a purpose-made plug.

Shaking the cartridge from side to side helps distribute the toner evenly.

3. Toner Refill Level Circuitry

Some cartridges have an additional refill step. This is the level circuitry. It comes after either of the steps above.

Some devices have toner level-sensing chips, users often have to slide the old chip out of its mount and replace it so that the printer recognizes that the cartridge is full.

Perhaps next time you call in the expert, stand by, and with this in mind, you won’t have to call him/her again and by extension you will without a doubt save some bucks

But until then enjoy your printing experience and of course we wish you all the best.

How Toner Cartridge Recycling Methods Save the Environment

Toner cartridges comprise complex non-biodegradable polymers. The chain of complex bio-molecules emitted from electronic wastes, toner cartridges among them, are the biggest threat to the environment other than carbon emissions.

The polymers can take close to 100 years to decompose.

According to leading environmental science journals, about 18 million cartridges are thrown out every year. The figure being that of Australia alone.

This could be hundreds of billions of toner cartridges in landfills the world over. The irony is that these are cartridges that could as well be recycled to save the environment as well as unnecessary costs incurred in production.

With the budding amount of electronic wastes, it is of all time becoming ever more important to recycle rather than dump.

Recycle centers revamp or rather refurbish, refill, and then resell the toner cartridges, often at considerably lower prices.
In most cases, the results a user gets with a repaired toner cartridge are similar to such when she/he uses a branded toner cartridge.

Why Recycle Toner Cartridges

According to the publications, barely 15 percent toner cartridges are recycled every calendar year.

This translates to over 75,000 tons of cartridges in landfills in developed countries of Europe and the United States (US).

The reports also estimate about 300 million of the same are dumped in the two continents alone.

Further, studies also indicate a single toner cartridge requires approximately 1.5 kilograms of the engineering polymer materials to manufacture.

This simply means recycling and or reusing the cartridges can save the manufacturer so much in terms of resources and while at it keep the environment not only clean but also safe.

Other than cutting down production costs and keeping the environment clean, through buyback  programs and toner cartridge refills, the buyer can also get a great deal of money saved as well.

There are numerous toner cartridge recycling programs and a variety of choices along with them. The secret here lies in choosing to dispose of your old toner cartridge in a responsible environmental friendly manner.

Learning how to recycle toner cartridges can be of great help to you and you can as well contribute to the protection of the environment in the following 3 simple ways: Company Recycling, Recycling Programs, and Selling of the Toner Cartridges.

Company Recycling

Brand toner cartridge manufacturing companies such as Canon, Lexmark, and Hewlett Packard (HP) have programs for recycling their cartridges.

The programs are generally available on their websites even though details and the specifics of each may vary from one product or company to another.

Most of these programs work through a program called the Planet Ark.

The program includes drop-off points at various participating retail stores. It should be noted most manufacturers only accept original cartridges. ..

In this case, users who may want to recycle third generation or rather generic cartridges may have to look for other recycling methods.

2. Recycling Programs

Recycling programs vary from recycling banks to recycling drives depending on relevant laws of the particular country.

In Australia for instance, users organize themselves in groups and offer a common drop-off point in the form of recycling banks.

Others are also known to offer curbside pick-ups for the e-wastes.

Due to the dissimilarity, local authorities should specify a preferable way of toner cartridge recycling in a given area. General practice however, is to drop-off toner cartridge at the bank then you send a mail indicating the same.

3. Refilling Toner Cartridges

Despite the above, many people still choose to refill their own toner cartridges. There are also companies that offer services, which include refilling cartridges and sending them back to the various customers.

Refilling is one other a way for consumers to save money they would have used on new cartridges as well as ensuring the environment remains clean and safe by reducing the amount of e-waste going into landfills.

It involves purchasing the right refill kits with the right toner and support equipment. The users should ensure the toner matches the one previously used in the printer.

They should also ensure the refill is compatible with the printer. Important to note is the fact toner cartridge refill route is a tedious procedure that requires one to be familiar with. Alternatively you may get services of a professional.

4. Buy Back Programs

While it is probable to recycle your toner cartridges through a recycling program, there are also organizations working independently who offer cash for empty toner cartridges.

Just like the recycling programs, buyback programs also vary from one location to another. Companies that are involved in this kind of a business normally offer a small amount of money for used toner cartridges, which they refill and re-sell for in most cases the full value of the original cartridge.

This is by far the best option for those who want something back from their cartridges without going through the trouble of refilling them on their own.

While this may not seem a traditional toner cartridge recycling method, it is a good way to ensure it stays in use for a long period of time before it can actually be dumped.

What To Do When Your Toner Suddenly Runs Out

It seems printers are designed to run out of toner when you need it the most, that is, when you have a lot of work to be done.

They tend to jam on the big day. However, there is an old trick that might just buy you some time.

In most cases, the printers lock up and refuse to print once the light comes on but that doesn’t mean you can’t get a few more good print outs. Look, it’s simple.

Usually, toner cartridges have a small sensor hole on the non-gear side of the cartridge. Covering this up with a small piece of electrical tape is the trick you need to bring your printer back to life.

1. Remove and Shake The Cartridge

Cleaning the opening where ink comes out by rubbing a bit of alcohol or water using a piece of cloth is great. Care should be taken not to mix the printing colors in the process.

You should as well let the alcohol or water dry before assembling the toner cartridge back into the printer. Also, shaking the toner can be quite messy.

Both ink and the printing powder are dangerous and messy. 

Often, this happens when proper care is not taken while shaking the content of the toner cartridge where each cartridge has a small hole through which the printing materials do come out.

The tiny hole must always be covered with a paper towel or something similar so as to ensure the toner or ink doesn’t spill out.

Other than these two, the following might as well help you in case the toner suddenly gets finished.

3. Replace Toner

First, unplug from socket or switch off the printer/copier machine. This is both a safety measure and a matter of procedure. Take a moment till the machine cools down.

Then crack the printer open. Next open the front cover of the machine. You should be able to see the toner cartridge, which you will remove.

Now prepare the toner cartridge by removing paper inserts from area and touch it carefully by its handle to avoid any damages.

Just before you do a replacement, gently move and shake the new cartridge to ensure the toner is distributed in it evenly.

Replace the toner by using arrows and guides to insert the new one properly in its designated slot, and then close your printer/copier machine.

4. Redistribute Toner

That was the usual way; when at least you have something in stock. However sometimes it is not the case.

Still in a situation where the toner just finished, and your work is due; with high hopes you swiftly turn to the office supply closet and notice mouth a gap there is no toner nor any refill kit items.

Surely this is not the time for such disappointment. You desperately need to finish printing the documents to avoid landing in trouble with your boss.

However, you can still get a few more quality pages out of your printer. All you need to do is to redistribute the liquid in the existing cartridge.

The procedure is rather similar to that of replacing your toner. Turn off and unplug the printer. Open the front hatch, and gently pull out the cartridge.

Then roll the part around a few times to enable the ink to reach every spot of the cartridge, and then reinsert the cartridge right back.

If you happen to drop toner on your clothing, use cold water to remove it, and avoid rinsing with hot water, which may leave you with a permanent toner design on your favorite blouse.

5. Troubleshoot Printer

Other times it is not as obvious. Could be the printer stopped for another reason. Remember it works with a software, which may as well be the reason.

So if the printer/copier machine fails to work despite the above two, try something else, troubleshoot it. It may as well be the quick fix solution.

6. Stock Up on Supplies

And lastly on this, running out of toner is a tricky situation. But merely an inconvenience if you are prepared with a spare.

It is always best to know the exact page yield of your toner so that way you get prepared, and avoid the disappointment.

It is also important to know that; adjusting your spending traditions, employing certain behavior changes around the office, purchasing toner cartridges in bulk, encouraging members of staff to lay off excessive graphics and colors before printing and of course opting for toner replacement services will certainly save you the drama.